
A zoned rubber-first approach is the most durable, broadly useful strategy for home gym flooring. Use 3/8"–1/2" rubber tiles or rolls as your base layer, then place 3/4" stall mats or heavy-duty rubber sheets in any rack or drop zone. For most homeowners, rubber tiles with targeted stall mats hit the best balance of protection, longevity, and style flexibility. As Coop Mitchell of GarageGymReviews puts it, “flooring is the base of your gym” — and getting it right protects both your subfloor and your equipment.
Quick verdicts by activity:
- Heavy lifting zone: 3/4" rubber stall mats or high-density rolls; nothing thinner holds up to barbell drops
- Cardio zone: 6–10 mm rubber rolls or LVP (luxury vinyl plank) for low-impact machines
- Floor work/yoga zone: EVA foam tiles or a cork layer for joint cushioning and warmth
- Apartment/shared floor: Rubber over a high-density foam base to cut transmitted vibration
- Best single choice for most homeowners: 3/8" interlocking rubber tiles across the full floor, with 3/4" stall mats added in the lifting zone — cost-effective, DIY-friendly, and genuinely durable
Avoid the common pitfall of buying one product for every zone. Matching material to activity is what separates a floor that lasts a decade from one you replace in two years. For a broader look at common setup mistakes, that resource covers flooring errors alongside equipment choices.
Table of Contents
- How do you zone a home gym floor by activity?
- Which flooring material is right for your home gym?
- What specs should you compare before buying gym flooring?
- How do you install home gym flooring and prep the subfloor?
- How long does gym flooring last, and how do you maintain it?
- How do you make a home gym look like part of your home?
- What should you check before you buy gym flooring?
- Key Takeaways
- The floor sets the tone for everything else
- Couchanddumbells brings the whole room together
- Useful sources
- FAQ
How do you zone a home gym floor by activity?
Zoning means matching material density to the intensity of what happens in each part of the room. A barbell drop zone and a yoga corner have completely different demands, and no single product serves both perfectly.
Three practical layouts:
- Apartment or bedroom gym: Cover the full floor with 3/8" interlocking rubber tiles for impact protection and noise reduction. Add a thin cork or foam mat in the stretch corner. For apartment-specific guidance, the layout principles translate well to small spaces.
- Garage multipurpose gym: Use 3/8"–1/2" rubber tiles as the base, with 3/4" stall mats under the squat rack footprint. If the space doubles as a vehicle bay, choose polypropylene or PVC-based garage tiles rather than standard rubber — automotive fluids chemically degrade rubber over time.
- Basement heavy-lift room: Lay 3/4" rubber rolls or stall mats wall-to-wall, or use a dedicated deadlift platform over a rubber tile base.
Practical sizing tips:
- A standard squat rack footprint needs roughly 4 ft × 6 ft of stall-mat coverage
- A treadmill or bike requires at least a 3 ft × 6 ft equipment mat beneath it
- Equipment mats under cardio machines reduce vibration and protect the base floor without replacing it
Pro Tip: For upstairs gyms or shared walls, layer rubber tiles over a high-density foam underlayment. That combination reduces transmitted vibration more effectively than either material alone, and it keeps your downstairs neighbors happy.
Which flooring material is right for your home gym?
| Material | Durability / Impact | Shock Absorption | Aesthetics | Price / Sq Ft (retail) | Install Difficulty | Maintenance | Lifespan |
|---|---|---|---|---|---|---|---|
| Rubber rolls | Excellent | High | Industrial; color fleck options | $1.50–$3.50 | Moderate (heavy) | Easy; sweep/damp mop | 10–20 years |
| Rubber tiles | Excellent | High | Clean, modular; color options | $1.75–$4.00 | Easy (DIY) | Easy; sweep/damp mop | 10–20 years |
| Stall mats (3/4") | Best for drops | Very high | Basic black/green | $1.00–$2.00 | Easy | Easy | 15+ years |
| LVP | Good (low impact) | Moderate | Wood/stone looks; premium | $2.00–$5.00 | Moderate | Very easy; damp mop | 15–25 years |
| EVA foam tiles | Low | High (soft) | Bright colors; basic | $0.50–$1.50 | Very easy | Moderate; absorbs odors | 3–5 years |
| Cork | Moderate | Moderate | Warm, natural | $2.00–$4.50 | Moderate | Requires sealing | 5–10 years |
| Carpet tiles | Low | Low | Residential feel | $1.00–$3.00 | Easy | High; traps sweat/allergens | 3–7 years |
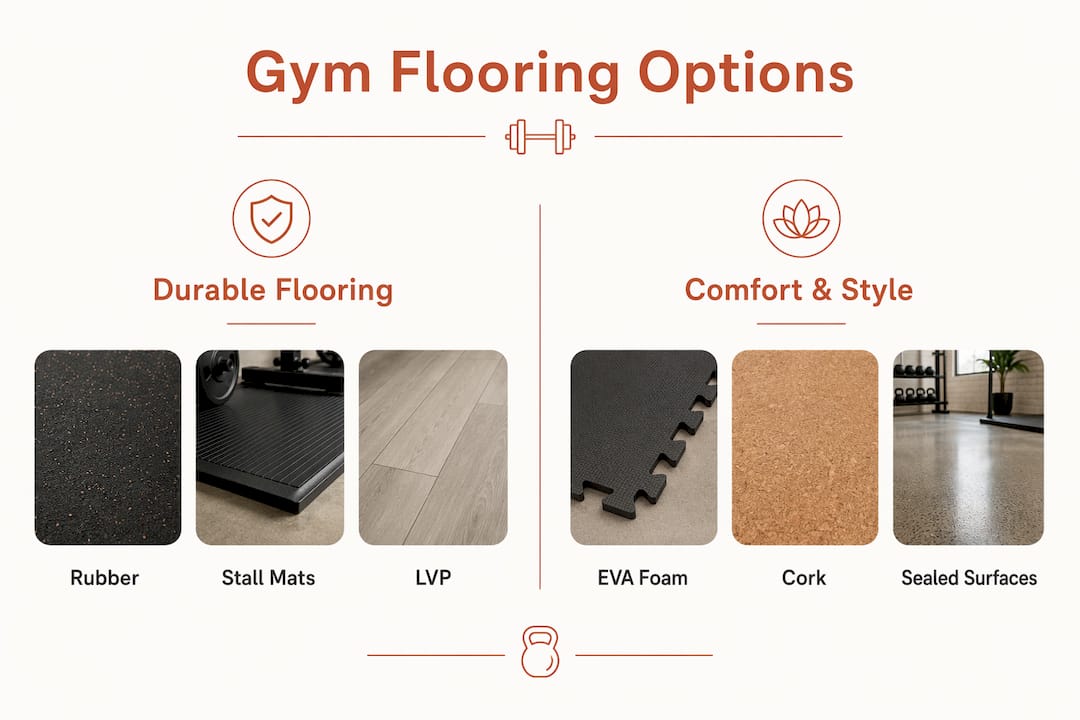
Rubber is the gold standard for durability. Rubber flooring resists scratches, gouges, and dents while handling heavy cardio equipment and barbell work. High-density commercial rolls engineered for extreme weight impacts measure force reduction around 17.4% and energy restitution around 66.3%, according to product testing data for 14.5 mm rolls. The trade-off: rubber is heavy, and bright-colored options made from virgin rubber cost more than recycled-content black rolls.
LVP earns its place in low-impact zones. It’s waterproof, easy to clean, and available in finishes that genuinely look like hardwood or stone. Many homeowners use it in cardio corners or stretching areas where they want the gym to feel like part of the home. Professional installation adds cost but delivers cleaner transitions to adjacent rooms.
EVA foam is a reasonable starting point for yoga and bodyweight work. It’s inexpensive and comfortable on joints, but foam compresses under heavy equipment and can deform permanently under a loaded rack. Think of it as a supplement, not a foundation.
Cork offers a natural, warm aesthetic and decent cushioning for floor work, but it needs sealing to resist moisture and won’t hold up under heavy weights. Carpet tiles are the least recommended option for active gym spaces — they trap sweat, allergens, and odors, and wear out quickly under equipment.
What specs should you compare before buying gym flooring?
Specs matter more than marketing language. Here’s what to actually check:
- Thickness: 3/8"–1/2" (10–12 mm) for general rubber tile use; 3/4" (19 mm) or stall mats for heavy barbell drops; 6–10 mm rolls for cardio areas
- Density/durometer: Higher durometer = firmer rubber; aim for Shore A 60–80 for general gym use, higher for drop zones
- Wear layer (LVP): 12 mil minimum for light gym use; 20 mil or more for areas with rolling equipment
- Slip resistance: Look for ASTM F2772 test results; REGUPOL aktivlok tiles report 12.9%–13.7% force reduction per ASTM F2772 — a useful benchmark for comparing products
- Compression set (foam): Lower percentage = better recovery after load; above 25% compression set means the tile will deform under heavy use
- VOC/emissions: Look for FloorScore or GREENGUARD Gold certification, especially for basement or enclosed spaces
Pro Tip: Before you order, ask the vendor for actual lab data, not just marketing claims. Any reputable supplier of commercial-grade rubber can provide ASTM test results. If they can’t, that’s a signal to keep shopping.
“Flooring is the base of your gym.” — Coop Mitchell, GarageGymReviews
How do you install home gym flooring and prep the subfloor?
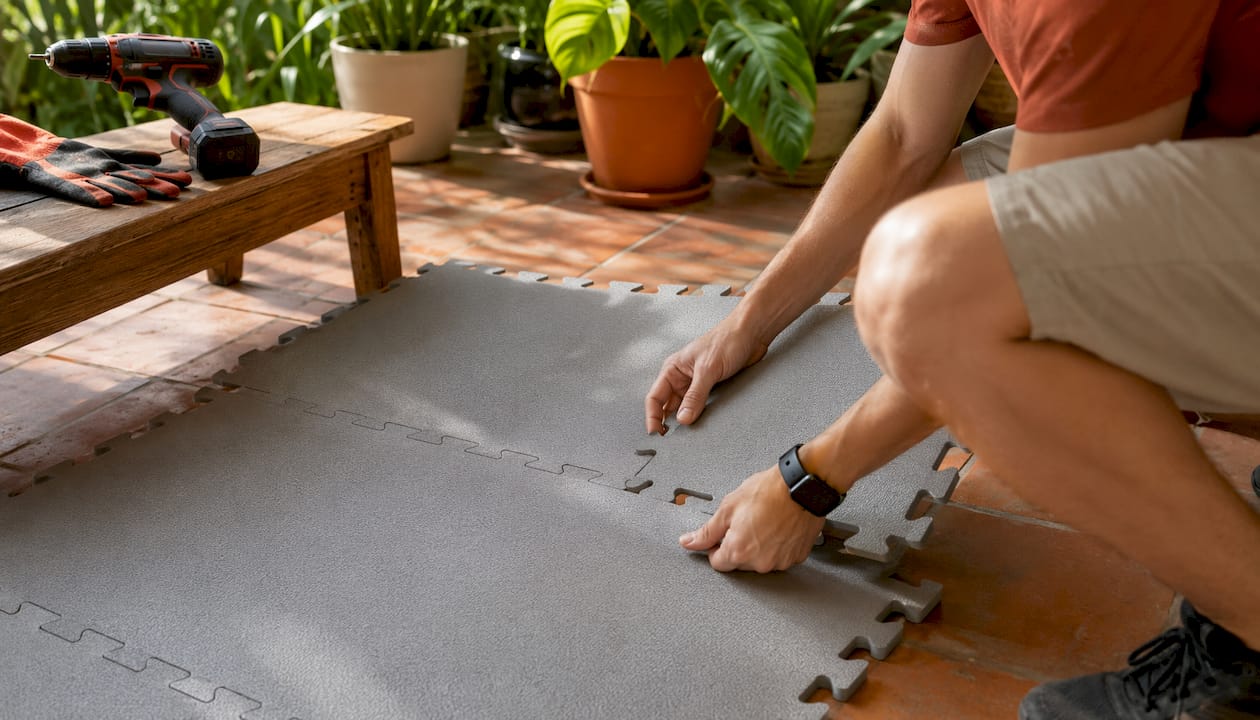
Getting the subfloor right matters as much as the material you choose.
Subfloor checklist:
- Check flatness: any variation greater than 3/16" over 10 feet will cause tiles to rock and seams to gap
- Test for moisture: use a plastic sheet taped to the concrete for 24 hours; condensation means you need a vapor barrier
- Confirm existing-floor compatibility: rubber over hardwood can trap moisture; LVP over uneven concrete needs a self-leveling compound first
- Plan transitions: low-profile T-molding or reducer strips keep edges clean where gym flooring meets hallway or living space
- Verify load-bearing capacity for basement installations with heavy equipment
Install types and time expectations:
- Dry-lay interlocking tiles: Easiest DIY option; a 200 sq ft room takes 2–4 hours. No adhesive, no special tools.
- Floating rubber rolls: Heavier and harder to maneuver alone; budget a half-day for a single-car garage. Seams need double-sided tape.
- Glue-down rolls: Most permanent and flat; requires adhesive and a full cure time of 24–48 hours before use. Best left to a professional installer.
- Deadlift platform build: A 4 ft × 8 ft plywood-and-stall-mat platform costs roughly $150–$250 in materials and takes 3–4 hours to build. Worth it if you pull heavy regularly.
For a shared living space or a living room workout corner, dry-lay interlocking tiles are the right call — they go down fast and come up without damage.
How long does gym flooring last, and how do you maintain it?
Rubber rolls and tiles last 10–20 years with basic care. Stall mats routinely exceed 15 years. LVP can reach 15–25 years depending on wear-layer thickness. Foam tiles typically need replacement within 3–5 years, and carpet tiles within 3–7 years.
Simple maintenance by material:
- Rubber: Sweep weekly; damp mop with a pH-neutral cleaner. Avoid petroleum-based solvents — they degrade the rubber surface.
- LVP: Damp mop only; no steam cleaners, which can lift the locking joints.
- Foam: Wipe down after every session; foam absorbs sweat and odors faster than rubber.
- Cork: Sweep regularly and reseal annually to maintain moisture resistance.
Preventive habits that extend floor life:
- Place equipment mats under treadmills and bikes to reduce concentrated vibration
- Never drag loaded barbells or heavy racks directly across rubber tiles
- In a shared garage, keep automotive fluids away from rubber; a spill can cause chemical degradation over time
- Rotate heavy rack positions every year or two to prevent permanent compression
Warranties on commercial-grade rubber typically cover manufacturing defects for 1–5 years but exclude wear from heavy use. Real-world lifespan usually exceeds warranty terms when the floor is maintained properly.
How do you make a home gym look like part of your home?
The best gym floors don’t look like gym floors. Jason’s Carpet and Tile notes that many homeowners feel frustrated when performance flooring clashes with their interiors — and color-flecked rubber or LVP solves that problem directly.
Three design vignettes:
- Living-room corner studio: Use 3/8" charcoal or earth-tone rubber tiles with low-profile edge trim. Add a natural-fiber area rug in the non-equipment corner for warmth. Keep the palette neutral so the gym zone reads as intentional, not industrial. For more ideas, the aesthetically pleasing home gym guide covers layout and color in depth.
- Garage converted to warm-luxe gym: Lay 1/2" color-fleck rubber tiles in a charcoal/tan blend. Add wood-panel wall accents and warm-toned lighting to shift the feel from utilitarian to curated. Pair with open shelving for a clean, organized look.
- Basement multi-use room: Use LVP in the cardio and stretching zones, with stall mats in the lifting corner. The contrast between the two materials creates a natural visual boundary between zones. Blending fitness equipment with home decor becomes much easier when the floor itself does the zoning work.
Pro Tip: Order at least three sample tiles before committing. View them in your actual room lighting at different times of day — gym flooring colors shift significantly between natural and artificial light, and a color that looks great in a warehouse showroom can feel cold or flat in a home setting.
What should you check before you buy gym flooring?
Your pre-purchase checklist:
- Room dimensions (length × width, plus any alcoves or irregular shapes)
- Primary activities (heavy lifting, cardio, yoga, or mixed use)
- Subfloor type (concrete, wood, existing tile)
- Budget per square foot (retail material only vs. installed)
- Desired lifespan (5 years vs. 15+ years changes the material decision)
- Aesthetic goals (industrial, warm-natural, or matches existing home decor)
- Delivery and return constraints (rubber rolls are heavy; confirm return policy before ordering)
Questions to ask every supplier:
- What is the exact thickness and density/durometer of this product?
- What is the rubber composition — recycled content percentage?
- Does it carry FloorScore, GREENGUARD, or equivalent low-VOC certification?
- What does the warranty cover, and what voids it?
- Do you offer professional installation, and what does it cost per square foot?
Red flags to avoid:
- Vague specs (“premium quality” with no thickness or density listed)
- No third-party VOC or performance certifications
- A return policy that excludes cut-to-size or heavy rolls
- Strong off-gassing smell with no certification to back low-VOC claims
For a complete home gym equipment checklist, that resource pairs well with this buying guide.
Key Takeaways
A zoned rubber-first approach, with 3/8"–1/2" tiles as the base and 3/4" stall mats in the lifting zone, gives most homeowners the best combination of durability, protection, and design flexibility.
| Point | Details |
|---|---|
| Zone your floor by activity | Use dense rubber for lifting zones, LVP or foam for cardio and yoga areas. |
| Rubber is the durability standard | 3/8"–1/2" tiles for general use; 3/4" stall mats or rolls for barbell drop zones. |
| Specs beat marketing claims | Check thickness, durometer, wear layer, and ask for ASTM test data before buying. |
| Design is achievable | Color-flecked rubber and LVP deliver a premium look without sacrificing performance. |
| Couchanddumbells approach | Couchanddumbells pairs flooring guidance with curated home and fitness collections for a cohesive, design-forward gym space. |
The floor sets the tone for everything else
Most gym flooring guides treat aesthetics as an afterthought — a footnote after the durability specs. That framing gets it backwards. The floor is the largest visual surface in the room, and if it clashes with your home, you’ll unconsciously resist using the space.
The practical case for rubber is solid and well-documented. But the reason color-flecked tiles and LVP have grown in popularity isn’t just marketing — it’s that people actually use spaces they enjoy being in. A gym that looks like a curated room gets used more consistently than one that feels like a utility closet.
The zoned approach also deserves more credit than it gets. Treating a home gym as a single-material problem is what leads to compromises: foam that deforms under a rack, or rubber that feels cold and harsh in a yoga corner. Matching material to activity isn’t complicated, but it does require thinking about the room in sections rather than as one undifferentiated floor.
If you lift heavy, start with the stall-mat zone. Everything else can be refined over time.
Couchanddumbells brings the whole room together
Your flooring choice is the foundation, but the room around it shapes how the space actually feels to live and train in.

Couchanddumbells curates home interior pieces and fitness accessories that complement a design-forward gym — from storage solutions and accent furniture to performance gear that matches the aesthetic you’re building. The Home & Interior collection includes shelving, storage, and decor that pair naturally with premium flooring choices, so your gym corner reads as intentional rather than improvised. For fitness gear that matches the same standard, the Fitness & Gear collection covers equipment and accessories suited to home training spaces of every size. Browse both collections and find the pieces that complete your space.
Useful sources
Short note: always request vendor spec sheets and, for high-impact installations, ask specifically for ASTM lab data on force reduction and energy restitution. Marketing descriptions rarely tell you what you need to know.
- GarageGymReviews — Expert-Tested Home Gym Flooring: hands-on testing across setup, durability, and sound categories
- EverydayHomeGym — Rubber Rolls, Tiles & Mats Buyer’s Guide: zoning guidance and thickness thresholds
- Lowe’s — How to Choose Home Gym and Garage Flooring: material comparisons and garage-specific advice
- FlooringInc — Foam vs. Rubber: side-by-side durability and use-case breakdown
- Jason’s Carpet and Tile — Home Gym Flooring: installer perspective on aesthetics and homeowner expectations
- REGUPOL America — aktivlok Interlocking Rubber Tiles: ASTM F2772 performance data for recycled rubber tiles
- Greatmats — Performance Beast Plus 14.5 mm Roll: commercial-grade force reduction and energy restitution data
- Couchanddumbells — Aesthetically Pleasing Home Gyms: design ideas for blending gym elements with home interiors
- Couchanddumbells — Best Professional Gym Flooring Options: editorial on durable flooring for home studios
| Source | Best for |
|---|---|
| GarageGymReviews | Independent product testing and expert quotes |
| EverydayHomeGym | Zoning strategy and thickness guidance |
| Lowe’s Buying Guide | Garage-specific material advice |
| REGUPOL America | ASTM performance benchmarks |
| Jason’s Carpet and Tile | Aesthetic and installer perspective |
FAQ
What is the most durable flooring for a home gym?
Rubber is the most durable home gym flooring material overall. For heavy lifting zones, 3/4" stall mats or high-density rubber rolls offer the best long-term protection for both the subfloor and equipment.
How thick should home gym rubber flooring be?
Use 3/8"–1/2" (10–12 mm) tiles for general training areas and 3/4" (19 mm) rubber stall mats or rolls specifically in barbell drop and rack zones.
Can you use LVP flooring in a home gym?
Yes, LVP works well in low-impact zones like cardio and stretching areas. It’s waterproof, easy to clean, and available in finishes that blend with home interiors, but it isn’t rated for heavy barbell drops.
How do you reduce noise and vibration in an upstairs home gym?
Layer rubber tiles over a high-density foam underlayment. That combination reduces transmitted vibration more effectively than rubber or foam used alone, which matters in multi-story homes or apartments.
What should you ask a flooring supplier before buying?
Ask for exact thickness, density or durometer, recycled-content percentage, VOC certification (FloorScore or GREENGUARD), warranty terms, and whether professional installation is available. Vague answers or missing certifications are red flags.