
Most people setting up a home gym make the same costly errors: ignoring space dimensions, skipping proper flooring, buying incompatible equipment, and arranging their space in ways that reduce safety and motivation. These common home workout setup mistakes compound quickly. What starts as one overlooked measurement or one impulse purchase can turn into a chain of returns, wasted money, and a gym you never use. The good news is that each mistake is entirely preventable with a clear plan and the right purchase sequence.
1. Common home workout setup mistakes start with skipping space measurement
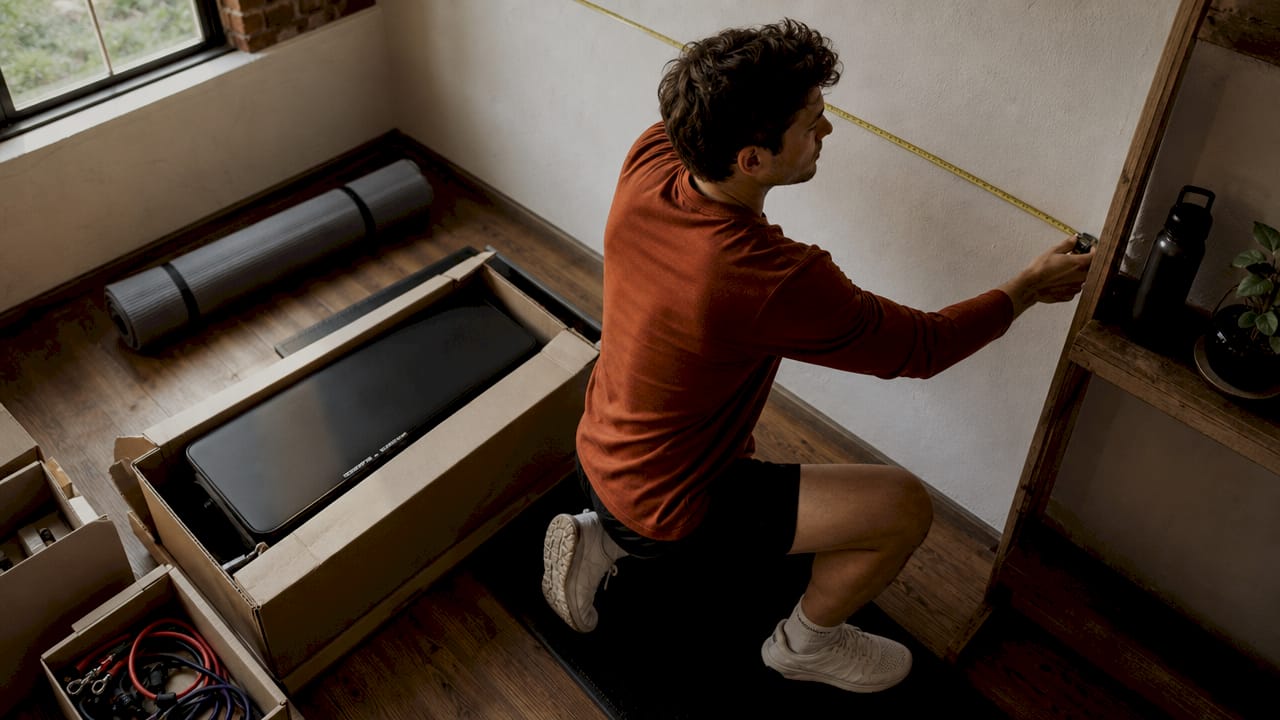
Not measuring your space before ordering equipment is the single most expensive mistake you can make. Narrow hallways, low ceilings, and tight stairwells can make delivery impossible for large items like power racks or cable machines. You need to know your room’s length, width, and ceiling height before you click “buy” on anything.
Key dimensions to check before purchasing:
- Ceiling height: Power racks typically require at least 8 feet of clearance. Add 12–18 inches for overhead pressing.
- Traffic flow: Leave at least 3 feet of clear walkway around all equipment for safe movement.
- Delivery path: Measure hallways, doorways, and stairwells. A 7-foot barbell will not turn a tight corner.
- Equipment footprint: Map out where each piece sits, including the space you need to use it safely.
Pro Tip: Draw a scaled floor plan on graph paper before you purchase anything. Assign each square to one foot of real space, then cut out paper shapes representing your equipment. Move them around until the layout works.
Beginners consistently buy equipment before measuring installation pathways, which leads to returns and unused gear sitting in a hallway. Measure twice, buy once. That rule applies here more than anywhere else in home fitness.
2. Skipping gym flooring damages your floor and your joints
Skipping gym flooring leads to floor damage, equipment wear, and unsafe workout conditions. Dropping weights on bare concrete or hardwood creates cracks, dents, and vibration that travels through the structure of your home. Your joints absorb the difference when the surface beneath you has no give.
The right flooring depends on your workout style:
- Rubber tiles (3/4 inch thick): Best for weightlifting and heavy drops. Durable and easy to replace in sections.
- Rolled rubber flooring: Good for larger spaces. Provides consistent coverage with fewer seams.
- Foam puzzle mats: Acceptable for yoga or light cardio only. They compress and degrade quickly under heavy loads.
- Stall mats (3/4 inch): A cost-effective option for garage gyms. Dense enough for barbell work.
Moisture is a real concern under flooring, especially in garages and basements. Lay flooring only after checking for dampness. Trapped moisture under rubber mats causes mold and degrades both the mat and the subfloor beneath it.
Pro Tip: Install your flooring before your major equipment arrives. It is far easier to lay rubber tiles in an empty room than to work around a 300-pound rack.
Check out the best gym flooring options for home studios to find the right thickness and material for your specific workout style.
3. Buying standard plates instead of Olympic plates
Standard 1-inch plates do not fit Olympic bars and cap your total weight capacity at around 250 lbs. That limit arrives faster than most people expect, and standard plates carry poor resale value when you eventually need to upgrade. Olympic plates and bars are the industry standard for a reason.
Olympic bars use a 2-inch sleeve diameter. Standard bars use a 1-inch diameter. The two systems are not interchangeable. Buying standard plates to save money upfront means buying Olympic plates again later, which doubles your cost.
Stick with Olympic equipment from the start. The initial price difference is smaller than the cost of replacing an incompatible set.
4. Buying a treadmill as your first major purchase
Treadmills occupy 20–30 square feet and typically last 2–5 years with limited training modes. For the same footprint and cost, a barbell and bumper plate setup delivers far more training variety and longevity. A treadmill trains one movement pattern. A barbell trains hundreds.
The recommended equipment purchase sequence is: flooring first, then a power rack, an Olympic barbell, weight plates, an adjustable bench, and finally dumbbells or kettlebells. This order gives you something useful at every stage. You can train the day your rack arrives. A treadmill sitting alone in a room gives you cardio and nothing else.
If cardio is a priority, consider a jump rope, resistance bands, or a compact rowing machine before committing floor space to a treadmill. These options cost less, take up less room, and complement strength training rather than competing with it for space.
5. Choosing fixed dumbbells over adjustable options
Fixed dumbbell sets look appealing in fitness catalogs, but they consume enormous floor space and cost significantly more per pound of weight than adjustable alternatives. A full fixed set from 5 lbs to 50 lbs requires a dedicated rack and 15–20 square feet of space. An adjustable dumbbell pair covers the same weight range in the footprint of a shoebox.
For home gyms where space is limited, adjustable dumbbells are the practical choice. They allow you to progress gradually without buying new equipment at every milestone. Pair them with a home gym equipment checklist to build your setup in a logical, budget-conscious order.
6. Placing mirrors behind your rack
Mirrors placed behind racks are dangerous. Glass can shatter if a barbell contacts the mirror during a failed lift. The result is broken glass at the exact moment you are most vulnerable, under load and off balance. This is one of the most overlooked fitness space mistakes in home gym design.
Place mirrors on side walls or on walls you face during primary lifts. A mirror positioned to your left or right during a squat gives you a clear view of your form without putting glass directly behind a loaded bar. The goal of a mirror is form feedback, not decoration.
7. Poor ventilation and lighting
Poor ventilation and lighting decrease motivation and increase injury risk in home gyms. A stuffy, dim room makes every workout feel harder than it needs to be. You will skip sessions in a space that feels uncomfortable, regardless of how good your equipment is.
Practical fixes:
- Add a box fan or ceiling fan to move air during sessions.
- Install bright LED lighting at 4,000–5,000 Kelvin for a clean, energizing light tone.
- If your gym is in a basement or garage, add a dehumidifier to control moisture.
- Use natural light where possible. A window makes a real difference in how the space feels.
Pro Tip: Treat lighting as a non-negotiable, not an afterthought. Bright, even lighting also makes it easier to check your form in mirrors and spot hazards on the floor.
8. Pushing equipment flush against walls
Equipment placed directly against walls blocks airflow around motors and cables, accelerates wear, and makes maintenance nearly impossible. Cardio machines like rowers and stationary bikes need at least 2 feet of clearance at the rear. Racks need clearance on all sides for loading plates and for safety bar access.
Flush placement also creates dead zones where clutter accumulates. Accessories, towels, and water bottles pile up in corners, and pathways narrow over time. Keep your gym accessories organized with a dedicated storage system so the floor stays clear and the space stays functional.
9. Buying premium or novelty gear too early
Specialty equipment like glute machines, cable towers, and functional trainers are excellent tools. They are not the right starting point. Most individuals make 3–5 compounding mistakes in their first home gym build, and buying specialty gear before mastering the basics is one of the most common. Premium equipment sits unused when you do not yet have a structured program to use it.
Build your foundation first. A rack, a barbell, plates, and an adjustable bench cover the majority of effective strength training movements. Add specialty equipment only after you have used your foundation consistently for at least six months.
10. Setting up without a training program
A well-equipped gym without a training plan is just an expensive storage room. Functionality beats aesthetics every time. A simple space with a clear program produces better results than a beautiful gym with no structure. Decide on your training approach before you buy your first piece of equipment. Your program determines what you actually need.
Read through a resistance training home space guide to align your equipment choices with your actual training goals before spending a dollar.
Key Takeaways
Avoiding common home workout setup mistakes requires planning your space, flooring, and equipment sequence before making any purchase.
| Point | Details |
|---|---|
| Measure before you buy | Check ceiling height, doorways, and floor space before ordering any equipment. |
| Install flooring first | Rubber flooring protects your subfloor, equipment, and joints from day one. |
| Follow the purchase sequence | Buy flooring, then a rack, barbell, plates, bench, and dumbbells in that order. |
| Choose Olympic over standard | Standard plates cap your progress and carry poor resale value. |
| Plan your layout for safety | Keep mirrors off the wall behind racks and maintain clear pathways throughout. |
What I have learned from watching people build home gyms
The pattern I see most often is this: someone gets excited, orders a treadmill and a set of fixed dumbbells, and then realizes two weeks later that the treadmill takes up half the room and the dumbbells only go to 30 lbs. The excitement fades fast when the space does not work.
Planning from the space backward changes everything. When you start with your room dimensions and work forward to your equipment list, every purchase has a purpose and a place. When you start with a wishlist and work backward to your room, you end up with a return label and a bruised ego.
The other thing I have seen consistently is that people undervalue flooring. It feels like a boring purchase compared to a shiny new rack. But flooring is the foundation of every single workout you will ever do in that space. Cheap foam mats compress within months under heavy use. Quality rubber flooring lasts a decade. That is not a small difference.
My honest advice: spend less on equipment than you think you need, spend more on flooring than you think you should, and write down your training program before you buy anything. A used rack and a solid plan will always outperform a premium setup with no direction.
— Brian Dunn, Couch & Dumbbells
Build your home gym right with Couchanddumbells
Setting up a home gym is one of the best investments you can make in your long-term health. Getting the foundation right from the start means you spend less over time and use your space more consistently.
Couchanddumbells carries a curated range of fitness gear and home gym equipment designed for real home spaces, not commercial facilities. From space-saving portable fitness equipment to quality accessories that keep your setup functional and organized, every product is chosen with intentional living in mind. Browse the full collection and build your space the right way, one quality piece at a time.
FAQ
What are the most common home gym setup mistakes?
The most frequent errors are skipping space measurement, buying equipment before flooring, choosing standard plates over Olympic, and placing mirrors behind racks. Most first-time builders make 3–5 of these mistakes in their initial setup.
What equipment should I buy first for a home gym?
The recommended sequence is flooring, then a power rack, Olympic barbell, weight plates, adjustable bench, and finally dumbbells or kettlebells. This order gives you functional training capability at every stage.
Is gym flooring really necessary?
Proper rubber flooring protects your subfloor from impact damage, reduces equipment wear, and cushions your joints during every session. Skipping it leads to floor damage and unsafe workout conditions over time.
Why is a treadmill a bad first purchase?
Treadmills consume 20–30 square feet of floor space and offer limited training variety compared to a barbell setup. A barbell and bumper plates cost less, take up less room, and support far more movement patterns.
How do I avoid poor lighting and ventilation in my home gym?
Install bright LED lighting in the 4,000–5,000 Kelvin range and add a fan or dehumidifier to manage air quality. Poor ventilation and lighting are proven to decrease motivation and increase injury risk in home training spaces.