
To set up a professional home training studio, you need five non-negotiables: a defined purpose, durable rubber flooring, one versatile strength anchor, quality lighting and basic tech, and liability coverage if you’re hosting clients. Get those right and everything else is finishing work.
What to buy first:
- Adjustable dumbbells or a barbell with plates and a power rack
- Adjustable weight bench
- Interlocking rubber flooring or horse stall mats
- Camera, microphone, and a display for virtual or hybrid sessions
- Resistance bands and a pull-up bar for versatility
Budget bands at a glance:
- Starter: $500–$1,000 (dumbbells, bench, mats, bands)
- Performance: $1,000–$2,000 (rack, barbell, full flooring, lighting)
- Professional: $2,000–$5,000 (dedicated circuits, AV setup, styled furnishings, insurance)
Pro Tip: Install flooring before any equipment arrives. Rearranging a rack after laying mats wastes time and risks scratching both.
Table of Contents
- How do you define the right purpose for your home studio?
- What does a professional studio layout actually look like?
- Core equipment: what to buy first and how to store it well
- How do flooring, acoustics, and lighting shape the studio feel?
- What tech setup makes virtual sessions look professional?
- Safety, insurance, and legal basics for paid home sessions
- What does a realistic phased budget and timeline look like?
- How do you style fitness gear so the studio feels like a designed room?
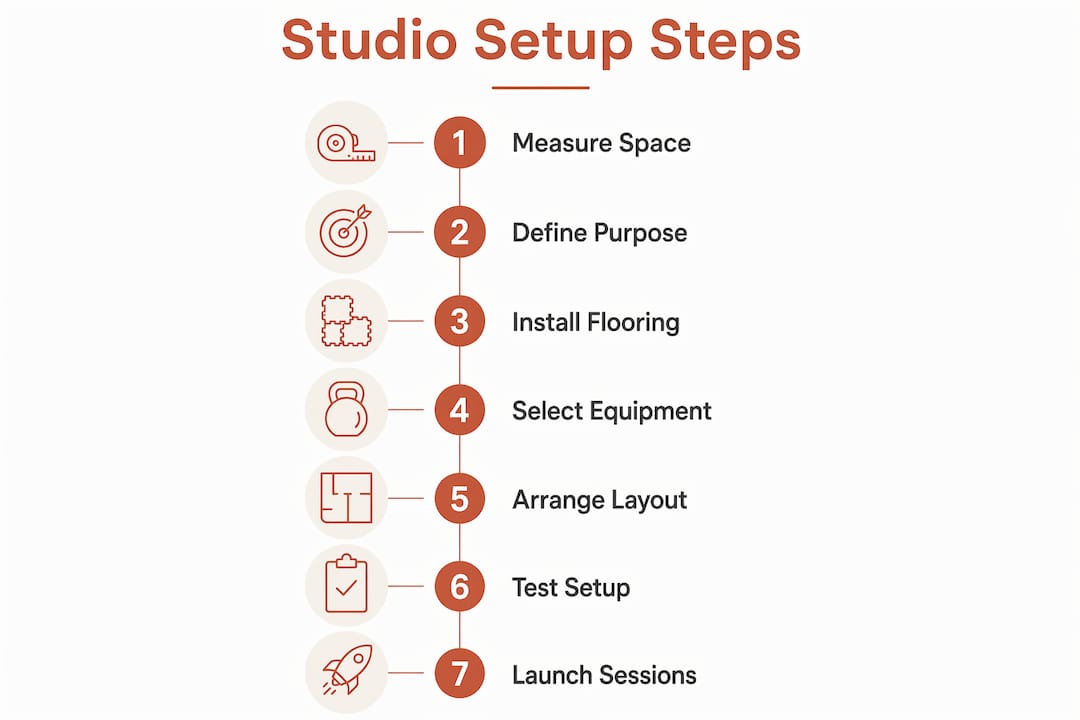
- Your quick setup checklist: from measuring to soft opening
- Key Takeaways
- Why intentionality beats buying more gear
- Finish your studio with curated pieces from Couchanddumbells
- FAQ
How do you define the right purpose for your home studio?
The single biggest decision you’ll make is whether this space serves you alone or paying clients. That choice reshapes everything from your insurance needs to how your front door looks.
A private high-end gym can be purely functional. A client-facing studio needs a clean arrival experience: ideally a separate entrance, a small staging area, and a background that reads as professional on camera. PT Distinction advises that a separate entrance and polished layout meaningfully improve client comfort and business credibility.
Work through these questions before you spend a dollar:
- Primary goal: strength, HIIT, mobility, or a hybrid?
- Session format: in-person only, virtual, or both?
- Maximum clients at one time (one-on-one vs. small group)?
- Storage needs: client towels, cleaning supplies, accessories?
Your answers directly affect zoning, ventilation, equipment priorities, and whether you need a home-occupation permit from your local municipality. A spare bedroom near the front door works well for one-on-one sessions; a garage suits small groups but needs climate control. You can also build a client home workout program around the equipment you already own before committing to larger purchases.
Pro Tip: Run a pilot week with minimal gear before buying anything major. One or two real sessions will reveal layout problems no floor plan can predict.
What does a professional studio layout actually look like?
A well-designed layout separates four zones within one cohesive flow: heavy-lift area, open conditioning floor, mobility/recovery niche, and a small arrival or staging spot for clients.
SOMA Fitness recommends measuring live clearance, not just equipment footprint. Allow 1–1.5 feet of side clearance around a power rack and 2–3 feet front and back for safe barbell movement. Ceiling height matters too: standard racks run 80–84 inches, so you need at least 8 feet of clearance, and 9 feet is more comfortable for overhead pressing.
Place mirrors on one wall only, positioned to check form during lifts without making the room feel like a commercial gym floor. Keep the arrival area near the door with a small bench or chair, a hook for bags, and a surface for water bottles. That simple staging area signals professionalism the moment a client walks in. For compact spaces, the living room gym corner guide from Couchanddumbells offers practical zoning ideas that preserve a home aesthetic.
Core equipment: what to buy first and how to store it well
Start with one strength anchor and a few versatile accessories rather than filling the room with single-purpose machines. Cleveland Clinic exercise physiologists recommend beginning with basic, versatile equipment and adding slowly to avoid unused purchases.
Starter tier:
- Adjustable dumbbells (replace a full fixed rack, save floor space)
- Adjustable weight bench (flat to incline, folds for storage)
- Resistance bands and a pull-up bar
Performance tier:
- Barbell, plates, and a power rack (unlocks every major compound lift)
- Kettlebell in one or two weights
Professional tier:
- Cardio equipment (rower or assault bike, added after strength zone is complete)
- Cable attachment or specialty bar
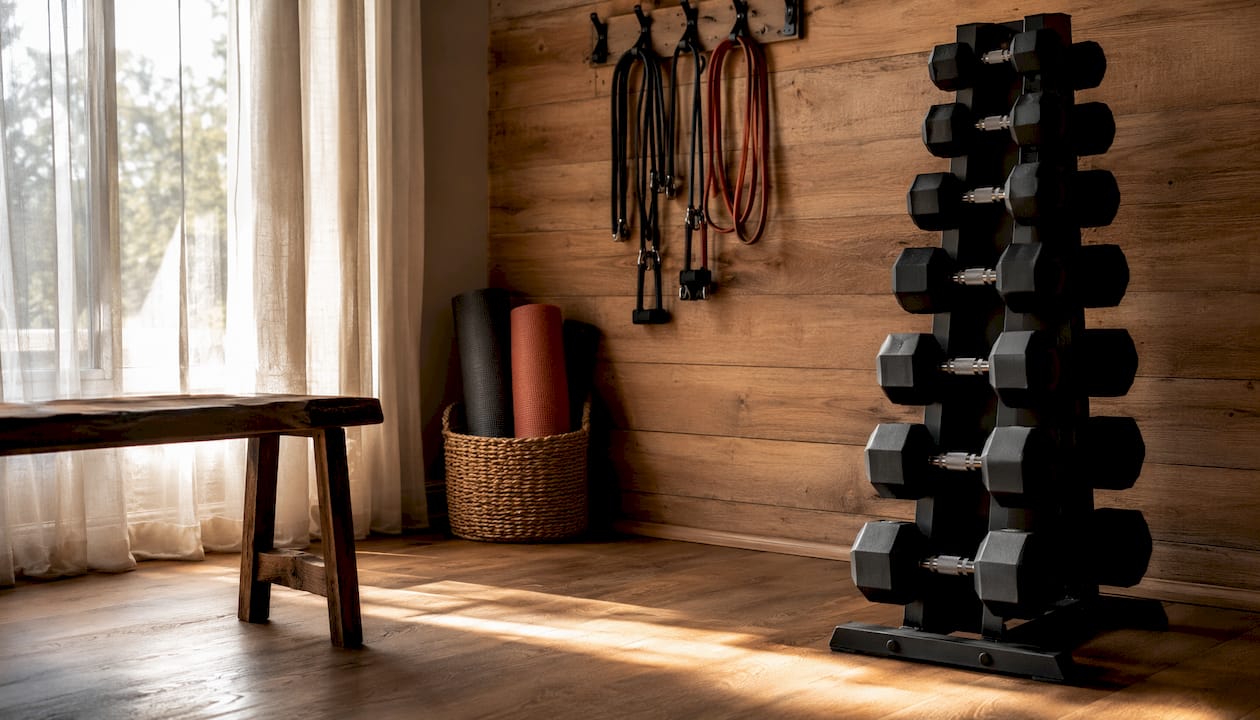
Storage keeps a studio looking intentional. Vertical dumbbell racks, wall-mounted hooks for bands, and closed cabinetry for cleaning supplies all reduce visual clutter. Woven baskets work beautifully for foam rollers and smaller accessories. A well-designed gym accessories storage system makes the difference between a room that feels professional and one that just feels crowded.
Pro Tip: Buy the best quality you can afford on the rack and barbell. Those two pieces will outlast every other item in the room.
How do flooring, acoustics, and lighting shape the studio feel?
Install flooring before equipment arrives — this is the one rule that saves the most rework. SOMA Fitness lists three main options with distinct cost and performance profiles:
| Flooring Type | Cost per sq ft | Best For |
|---|---|---|
| Horse stall mats (3/4") | $1.50–$3.00 | Heavy lifting, garages, basements |
| Interlocking rubber tiles | $3.00–$8.00 | Finished rooms, modular layouts |
| Rolled rubber | $2–$5 | Large open areas, clean aesthetics |
| EVA foam puzzle mats | $0.50–$1.50 | Starter setups, low-impact training |
For acoustics in garages or basements, rubber underlayment beneath flooring deadens impact noise significantly. Wall panels and soft furnishings (a small rug, upholstered client seating) absorb echo without major renovation.
AEKE recommends daylight-balanced LEDs at 5000K for form visibility and a professional look on camera. Pair ceiling fixtures with a portable LED key light near your anchor station. Ventilation matters too: a ceiling fan handles mild climates, while a mini-split is worth the investment for garages in hot or cold regions.
Pro Tip: 5000K LEDs eliminate the yellow cast that makes video sessions look amateur. They also make it easier to spot form errors during in-person training.
What tech setup makes virtual sessions look professional?
Prioritize stable connectivity first, then camera framing, then audio. A shaky connection undermines every other investment in the room.
At minimum, you need a 1080p camera or a smartphone on an adjustable tripod, a USB condenser or clip-on lavalier microphone, a single LED key light positioned at face height in front of you, and a display (TV or monitor) for client cues or program tracking. Electronics fitness accessories that mount cleanly to walls or shelves keep the setup tidy.
Camera height should sit at roughly chest level when you’re standing at your anchor station. Keep the background decluttered: one wall of equipment, a plant, and neutral tones read far better than a cluttered garage corner. Soft frontal lighting eliminates shadows that make faces hard to read on screen.
Pro Tip: Record a full mock session at your typical training distance before inviting any client. Watch it back for audio levels, framing gaps, and shadow problems — they’re always easier to fix before the first real session.
Safety, insurance, and legal basics for paid home sessions
If you’re hosting paying clients, treat the studio like a small business from day one. Professional liability insurance runs approximately $150–$500 per year depending on coverage level and certifications held.
Non-negotiable checklist:
- Professional liability insurance (secured before the first paid session)
- Client waiver signed before any training begins
- Basic first-aid kit, visible and accessible
- Safety signage on heavy equipment (rack spotter arm instructions)
- Emergency exit clearly marked and unobstructed
- Dedicated electrical circuit if running multiple high-draw appliances
Hygiene matters as much as safety for client retention. A simple cleaning schedule, spray bottles and towels stored in a labeled cabinet, and a brief wipe-down routine between sessions signal that you run a professional operation. Check your local municipality’s home-occupation rules before opening to clients; some jurisdictions require a permit for commercial activity in a residential property.
This article provides general information, not legal or insurance advice. Confirm current requirements with your local authority and a licensed insurance professional for your specific situation.
What does a realistic phased budget and timeline look like?
Build in three phases so spending stays aligned with actual use.
| Phase | Timeline | Key Purchases | Approx. Cost |
|---|---|---|---|
| Foundation | Weeks 1–2 | Flooring, adjustable dumbbells, bench, bands | $500–$1,000 |
| Performance | Months 1–3 | Power rack, barbell, plates, lighting, camera/mic | $1,000–$2,000 |
| Professional | Months 3–6 | Cardio equipment, AV display, styled furnishings, insurance | $2,000–$5,000 |
Buy used for plates and benches; the savings are real and quality holds. Hire an electrician for any dedicated circuit work before flooring goes down. Mirror and fixture installs are straightforward DIY, but flooring installers save significant time on large rubber tile layouts.
How do you style fitness gear so the studio feels like a designed room?
Treat every storage and equipment decision as a design choice. Match materials and finishes to your home’s existing palette rather than defaulting to commercial gym black-and-chrome.
Conceal bulky accessories in closed cabinetry or woven baskets. A terracotta accent wall, warm-toned wood shelving, or matte-black hardware ties equipment into a cohesive interior rather than making it look like an afterthought. A small potted plant near the client seating area softens the space without compromising function. Choose durable, easy-clean fabrics for any upholstered pieces.
For blending fitness equipment with home decor, the principle is simple: if it lives in the room permanently, it should earn its visual place. A resistance training home space can look genuinely beautiful with the right storage and a considered color palette. For Pilates or mobility-focused zones, well-chosen Pilates home equipment tends to be compact and visually clean by design.
Your quick setup checklist: from measuring to soft opening
A focused starter setup takes 1–6 weeks. A full professional studio typically runs 3–6 months when contractor work is involved.
Order of operations:
- Week 1: Measure the space, confirm ceiling height, map zones on paper
- Week 1–2: Order and install flooring (before anything else arrives)
- Week 2–3: Assemble anchor equipment (rack or dumbbell system, bench)
- Week 3–4: Install lighting, set up camera and audio, test connectivity
- Week 4–5: Add storage solutions, style the space, stock cleaning supplies
- Week 5–6: Complete safety checks, secure insurance, run two or three trial sessions
- Month 2–6: Add performance and professional-tier items as budget allows
Schedule contractor visits (electrician, flooring installer) before equipment deliveries. Rework after a rack is in place costs time and money.
Pro Tip: Confirm electrical capacity before adding a mini-split, treadmill, or any high-draw appliance. A dedicated 20-amp circuit is the standard minimum for most home gym setups.
Key Takeaways
A professional home training studio succeeds when you build in phases, install flooring first, and choose equipment that matches your actual training goals rather than filling the room.
| Point | Details |
|---|---|
| Floor first, always | Install rubber flooring before any equipment arrives to avoid rework and protect your subfloor. |
| Phase your budget | Build in three stages: foundation ($500–$1,000), performance ($1,000–$2,000), professional ($2,000–$5,000). |
| Anchor equipment wins | One quality strength anchor plus versatile accessories outperforms a room full of single-purpose machines. |
| Pro touches matter | Liability insurance, 5000K lighting, and clean storage signal professionalism to clients and camera alike. |
| Couchanddumbells curates the finish | Couchanddumbells offers storage solutions and styled furnishings that integrate fitness gear with home interiors. |
Why intentionality beats buying more gear
The studios that actually get used consistently share one quality: every item in the room has a clear reason to be there. That sounds obvious, but it runs counter to how most people approach a build. The instinct is to fill the space, to feel like the investment is justified by volume. The result is usually a cluttered room that feels like a chore to enter.
AEKE’s 2026 guidance frames this well: intentionality and strategic layout define professional setups far more than equipment quantity. A single well-placed rack, good light, and a clean background will serve you better than six machines pushed against the walls.
The design-forward approach Couchanddumbells champions isn’t about aesthetics for their own sake. A space that looks considered is a space you want to spend time in. That’s the real return on the styling investment: consistency. You train more in a room that feels good.
Finish your studio with curated pieces from Couchanddumbells
You’ve done the planning. Now the finishing work — storage, styling, and those final pieces that make a studio feel complete — doesn’t have to mean hours of sourcing from a dozen different places.
Couchanddumbells brings together curated home and interior furnishings and fitness gear selected specifically for spaces where design and function share the same room. From storage solutions that keep accessories tidy to portable fitness equipment that earns its visual place, the collections are built for people who want their studio to feel like a home, not a warehouse. Browse the full range and find the pieces that complete your build.
FAQ
How much space do you need to set up a home training studio?
Ceiling height should be at least 8 feet for standard racks.
Do you need a permit to train clients from home?
Many municipalities require a home-occupation permit for commercial activity in a residential property. Check with your local zoning office before hosting paying clients.
What flooring is best for a professional home gym?
Horse stall mats at 3/4" thickness ($1.50–$3.00 per square foot) are the most cost-effective choice for heavy lifting. Interlocking rubber tiles ($3.00–$8.00 per square foot) suit finished rooms and modular layouts.
Professional liability insurance costs around $150–$500 per year, depending on coverage level and certifications held.
What’s the single best first purchase for a home training studio?
An adjustable dumbbell set paired with an adjustable bench covers the widest range of movements in the least floor space, making it the strongest starter investment before a full rack system.